Learn how the Observe™ Position Sensor encoders work.
Build a LEGO car with the Position Sensor attached.
Set up your classroom workspace to use the car effectively.
Learn how to connect the device to this web page using your computer's Bluetooth.
Getting to Know the Position Sensor:
Plug your sensor into a USB-C charger and let it charge completely
before using it. While charging, the red LED will blink.
When it’s fully charged, the LED will stay
solid. After it’s charged, unplug the sensor. All activities
are done using battery power. After each
activity, the sensor automatically turns off to conserve
battery power.
How It Works:
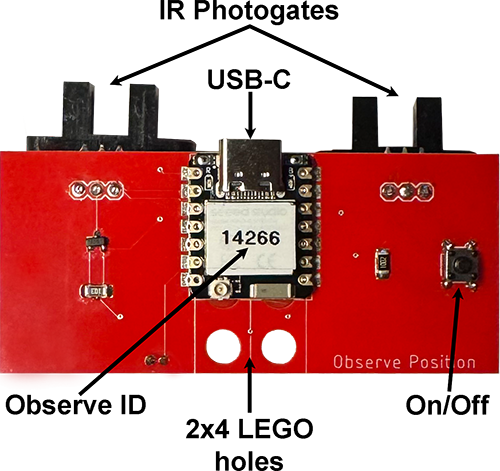
The position sensor uses two photogates that operate with infrared (IR) light.
Each photogate sends IR light across a narrow slot to a detector.
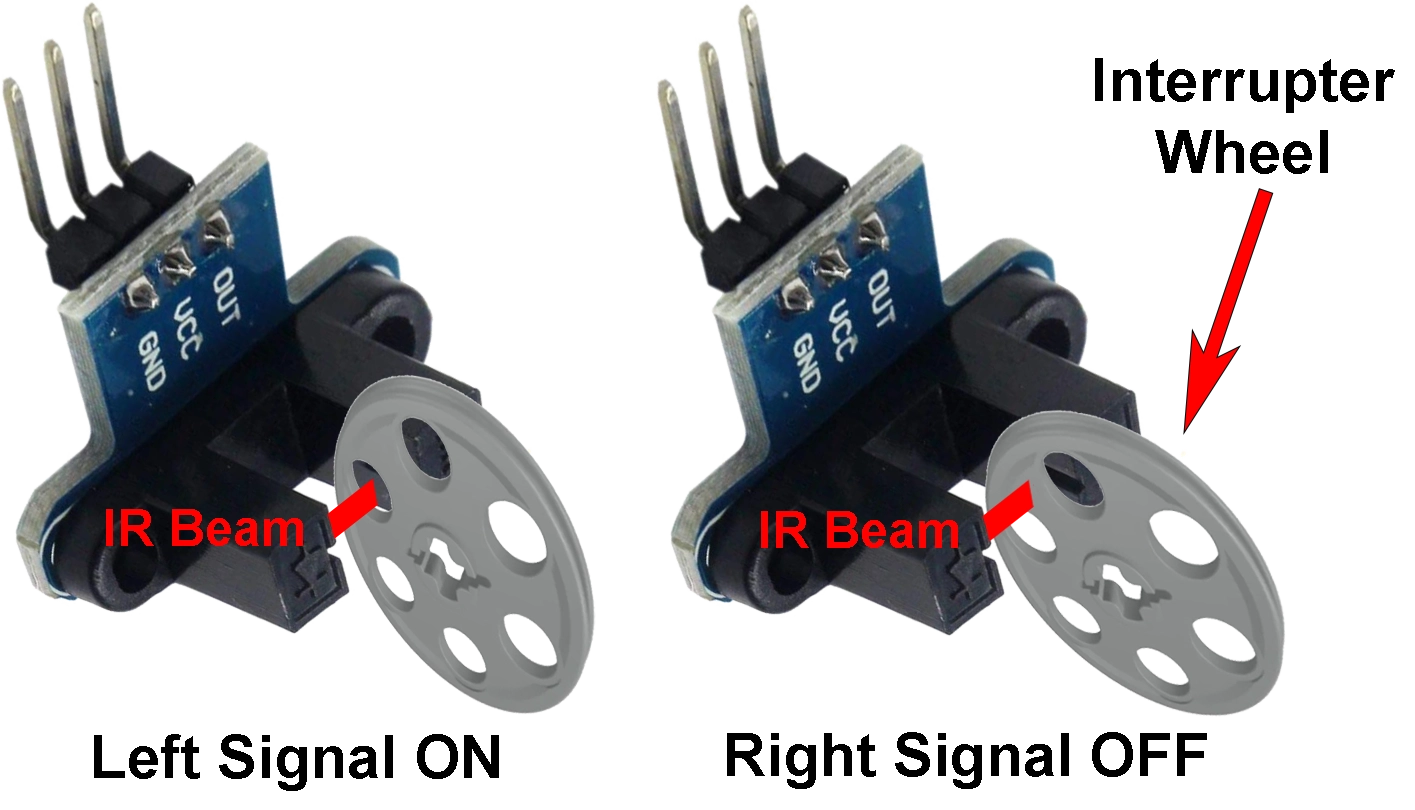
Each photogate works with a LEGO interrupter wheel that has six holes. The wheel
is attached to the axle; as it turns, it alternately passes and blocks the IR beam.
The photogate plus the interrupter wheel together are called an encoder.
When a hole aligns with the beam, the photogate is ON and outputs a high-voltage
electrical signal. When the plastic blocks the beam, it is OFF and outputs a low-voltage
signal. The sensor counts these high and low transitions to track the wheel’s motion.
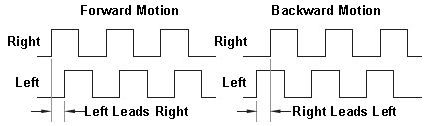
The two photogate signals (Left and Right) are 90° out of phase—this is a
quadrature configuration. The axle’s speed sets how frequently the square
waves occur. When the Left signal leads the Right, the axle is
turning forward. When the Right leads the Left, the axle is
turning backward. By comparing which signal changes first, their
timing and phase, the device determines both rotation direction and speed.
Linear distance is computed from the number of axle rotations times the
wheel’s circumference. With a LEGO wheel diameter of 3.03 cm,
the circumference is π·d ≈ π×3.03 ≈ 9.52 cm. So one full axle
rotation moves the car about 9.52 cm. If the interrupter wheel
has six slots, the photogate beam is interrupted six times per rotation,
producing square-wave signals like the ones shown above.
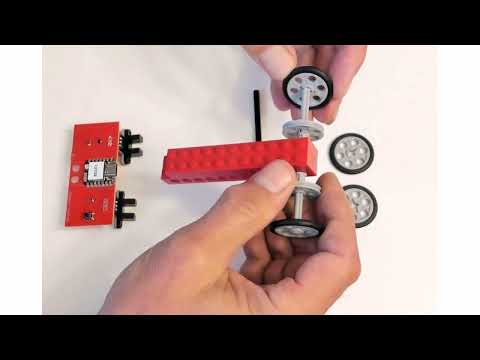
Build Your LEGO Car:
Follow these step-by-step to build your LEGO car.
×
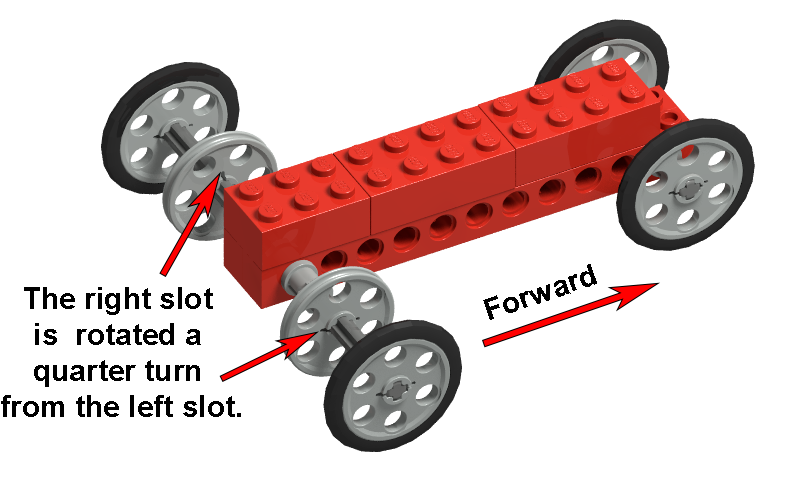
Ensure the right interrupter wheel slot is rotated a quarter turn
compared to the left.
Center each interrupter wheel in each photogate. This alignment is essential for correct
operation.
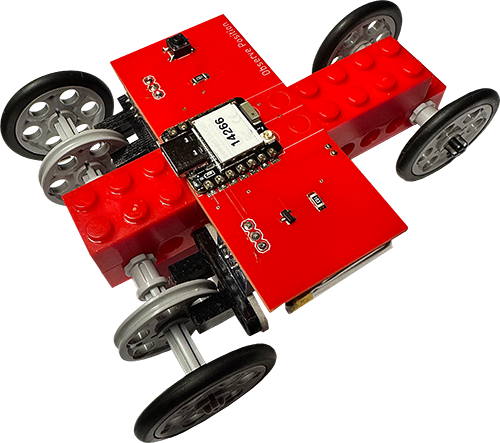
Line up the pegs on the 2x4 brick with the holes in the Observe Position board. Make sure the photogates are lined up with the encoder wheels. Gently press the board into place. Do not push too hard on the edges, or you might damage the circuits.
Set Up Your Workspace:
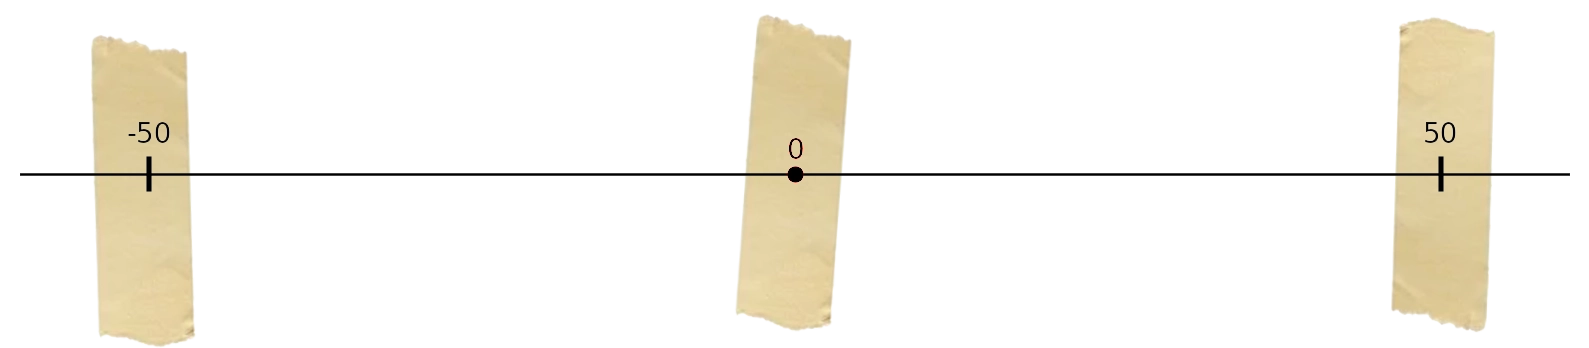
Place a small strip of masking tape on your desk as a reference point for zero.
Use a marker to write a zero on the tape.
Clear an area of about 50 cm on each side of the tape.
The right side of the reference point is positive, and the left side is negative—just like a number line.
Use a meter stick to measure and place pieces of tape at the -50 cm and 50 cm positions.
Label each piece of tape with these values.
Using Your Position Sensor:
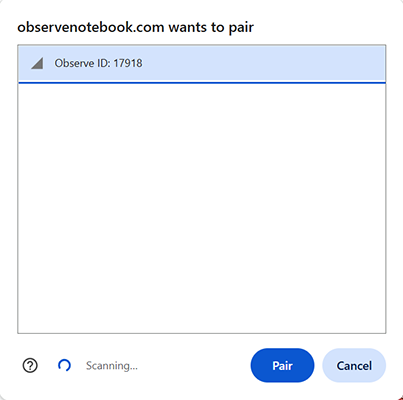
Press the car's On-Off button. The yellow status LED will blink, indicating it’s ready to pair with your computer.
The page’s Status in the upper bar will display Disconnected.
Enter your car's ID in the 5-digit ID window in the upper bar.
Click Connect Car button in the upper bar to pair.
A window will pop up, select your car's Observe ID, and click the blue "Pair" button.
Once connected, the yellow LED will remain solid. The page’s Status will update to
Measuring, and the car's live position will be displayed, animating the doggy's car!
Roll your car back and forth on your desk until the doggy's car lines up with zero on the number line.
Then pick it up and place it exactly at the zero mark on your number line.
Once it’s aligned at zero, roll the car back and forth again.
The car's position on the screen should match the position marks
you made on your table. If the animation does not match the number line, check The
alignment as shown in the Troubleshooting below.
Clicking this
will refresh the page and disconnect the sensor.
The yellow LED will begin blinking again, and the sensor can be
reconnected. Once the ID is entered into the browser, it will be saved for
easy access when reconnecting.
To turn off your sensor, press the On-Off button.
The yellow LED will stop blinking, indicating the sensor is off.
Troubleshooting:
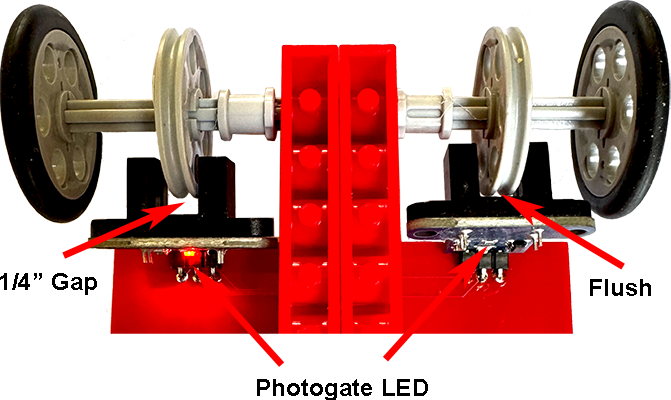
If the car moves backward in the simulation or the data looks
wrong, keep it connected to your PC. Turn the car over so the
front faces down and toward you. Roll the wheels forward and
watch the photogate LEDs. In this position, the left LED
should light up before the right one. If it does not, gently
bend the left photogate about 1/4 inch toward the front,
away from the interrupter wheel. Keep the right photogate
almost flush with the interrupter wheel. Make sure both
interrupter wheels are centered in the photogates,
and that the axle bushings are tight against the LEGO beams.
Ensure the interrupter wheel slots are rotated 90° out of phase.
Make sure the sensor’s battery is fully charged before use.
Verify that your computer’s Bluetooth is on and functioning.
Press the board’s “On” button and wait for the yellow LED to blink before clicking the connect button.
Enter the sensor ID into the text box exactly as it appears on the sensor.
Firefox and Safari do not support Bluetooth. For best results, use the Google Chrome browser.
Going Further:
Use these skills to operate the Observe™ position sensor in any of the
Observe™ Notebook position activities.
 Set Up Your Workspace:
 Using Your Position Sensor: