 What You Will Do:
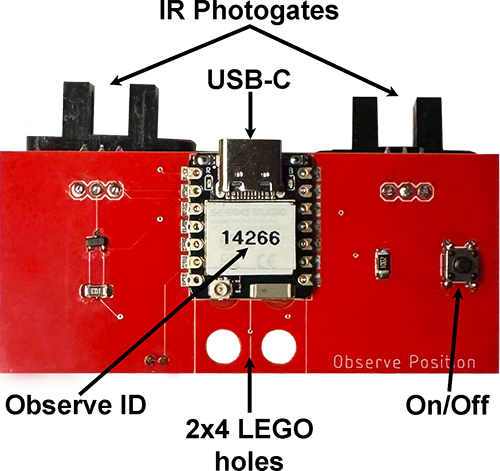
- Familiarize yourself with the Observe™ Position Sensor.
- Learn how the sensor measures position.
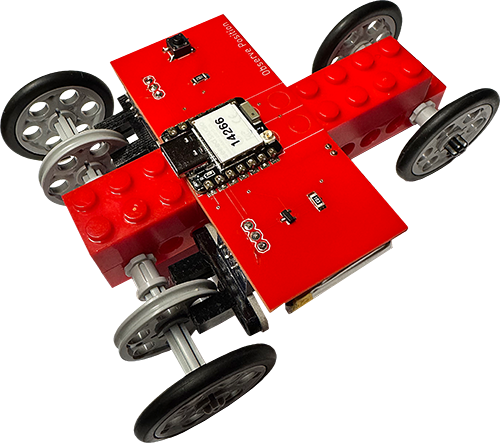
- Build your LEGO car and attach the position sensor.
- Set up your workspace for the Match the Graph activity.
- Prepare your TI-Nspire CX-II calculator with the TI Bluetooth Adapter.
- Open a Google Docs activity worksheet.
- Run the Match the Graph activity on your calculator.
- Click the “LEGO Car Help” button (top right) for guidance.
- Connect the battery pack to the connector on the sensor board.
- Plug the sensor into a USB-C charger and let it charge fully. While charging, the red LED will blink. When it is fully charged, the LED remains solid. After charging, unplug the sensor so it runs on battery power during activities.
-
The sensor uses two photogates with infrared (IR) light that shines across a small plastic gate.
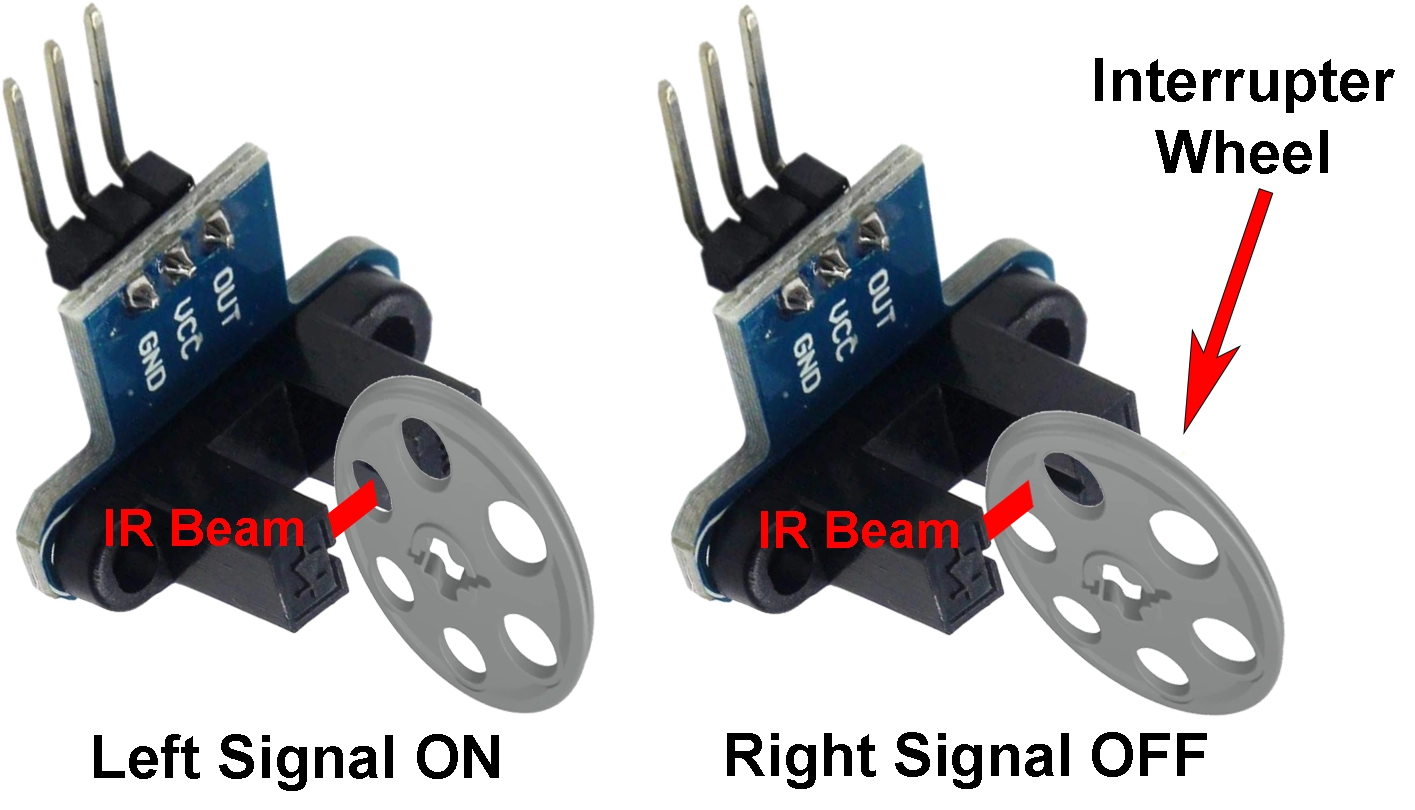
- Each photogate has a LEGO interrupter wheel with six holes. As the wheel turns, it breaks the IR beam to track movement.
-
When IR light passes through a hole, the photogate is ON and outputs a high-voltage signal. When the wheel blocks the light, it is OFF and outputs a low-voltage signal. The sensor uses these signals to track wheel movement.

- The two signals, Left and Right, are offset by one-quarter revolution (90°). In the diagram above, you can see that one signal starts just before the other. When the Left signal leads, the car moves forward; when the Right signal leads, it moves backward. The speed of rotation affects how fast these signals occur.
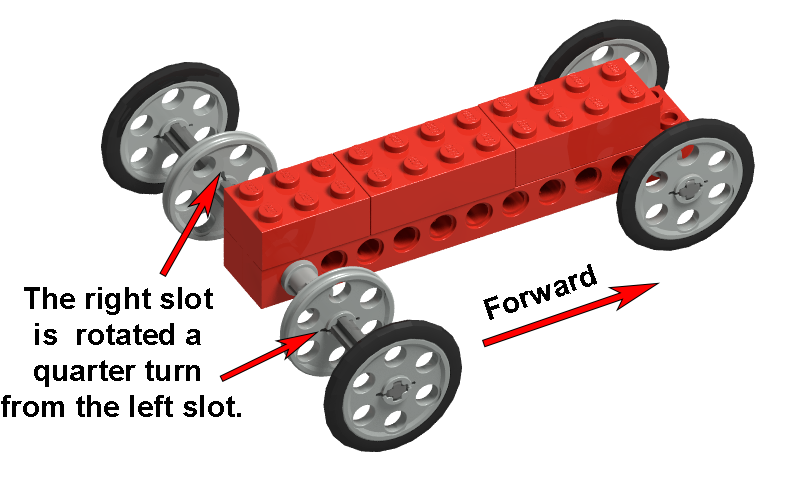
- Follow these step-by-step to build your LEGO car.
- Ensure the right encoder wheel slot is rotated a quarter turn compared to the left.
- Line up the pegs on the 2x4 brick with the holes in the Observe Position board. Make sure the photogates are lined up with the encoder wheels. Gently press the board into place. Do not push too hard on the edges, or you might damage the circuits.
 Set Up Your Workspace:
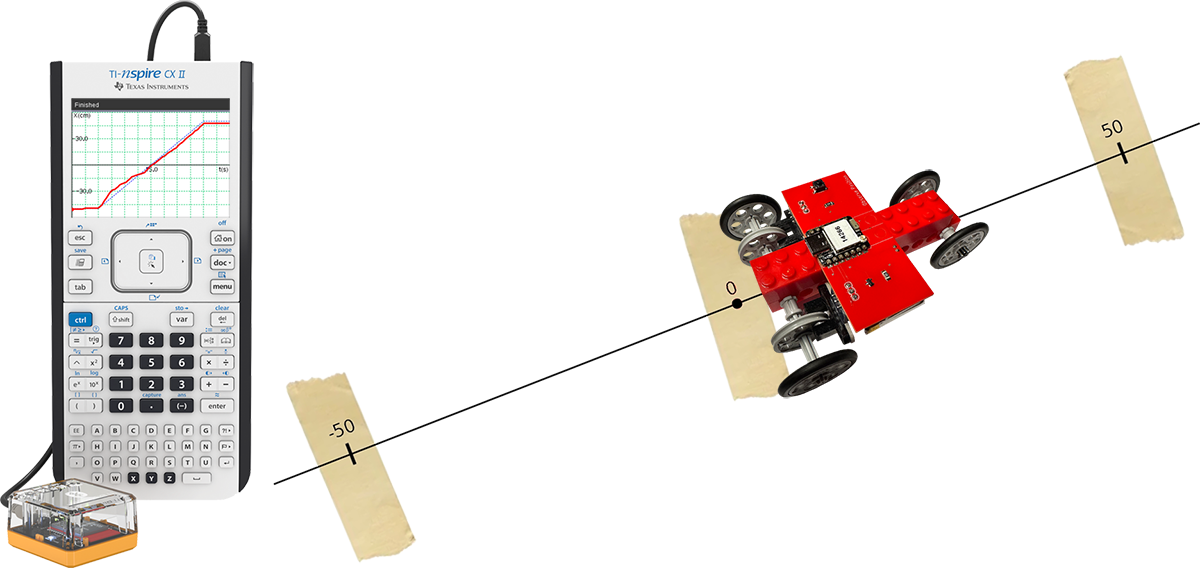
- Place a strip of masking tape on your desk and mark it “0” as your reference point.
- Clear an area of about 50 cm on each side. Right of zero is positive; left is negative—just like a number line.
- Use a meter stick to place tape at –50 cm and 50 cm, labeling each point.
- Click to open the worksheet. In Google Docs, go to File > Make a copy to save it to your Drive.

- Download the TI-Nspire activity file to your computer.
- Click to transfer the file to your calculator.
- Attach the TI Bluetooth Adapter to your calculator using the cable.
- Open the file on your calculator.
- Press the On/Off button on the car. The yellow LED will blink.
- Follow the on-screen directions.
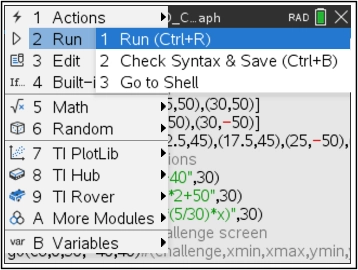
- Press the Menu key to access the program on page 1.3.
- To capture your graph, unplug the Bluetooth Adapter and connect your calculator to your PC. Click to copy the screen to your clipboard, then paste it into your worksheet.
- Use these skills to operate the sensor with your LEGO car and match other graphs.
- Create your own investigations with the blank graph template.
- Watch this Khan Academy video to learn more about position-time graphs.